Thamel, Kathmandu, Nepal

Things I Wish I Knew Before Starting the Mardi Himal Trek
Mardi Himal has a reputation as the "easy" Annapurna trek. Short itinerary, no long acclimatization detours, teahouses the whole way. I've watched fit, well-meaning trekkers get wrecked by a stone staircase they didn't respect, freeze at High Camp because their "warm enough" jacket wasn't, or miss the one clear viewpoint window of the week because they left ten minutes too late.
None of this is meant to scare you off — Mardi Himal is genuinely one of the most rewarding short treks in Nepal. It's meant to save you from learning these lessons the hard way, mid-climb, at 3,900 meters, when it's a little too late to do anything about it.
Quick Answer: The Things I Wish I Knew Before Trekking Madri Himal
|
What I Wish I Knew |
Why It Matters |
|
Don't judge the trek by its short duration |
Some days are far harder than the day-count suggests |
|
Break in your trekking shoes before you fly |
New boots and long descents are a recipe for blisters |
|
Pack for both heat and cold |
Conditions shift fast between the forest and the ridge |
|
Don't rush the first day |
Energy you burn early, you don't get back later |
|
Trekking poles are more useful than I expected |
They save your knees on the descent and your balance on loose stone |
|
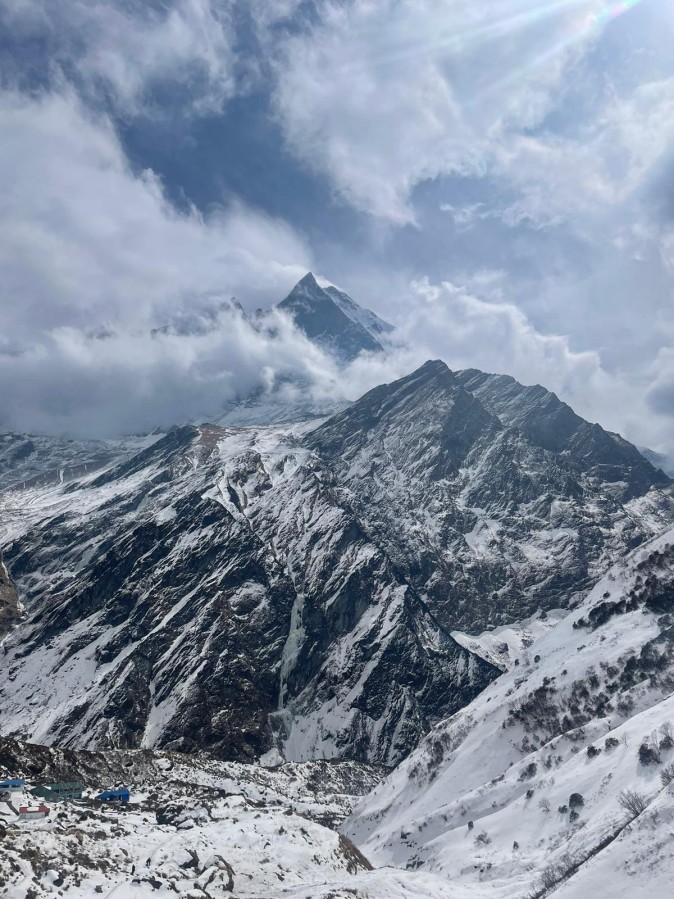
The upper ridge feels like a different trek |
Wind, cold and exposure increase sharply above the treeline |
|
Start early for the viewpoint |
Clouds build fast; the clearest window is usually first thing |
|
Don't underestimate the descent |
Downhill is where most fatigue and knee pain actually happen |
|
Keep your daypack light |
Every extra kilo shows up on the steep stone steps |
|
Protect your water from the cold |
Bottles and hoses can freeze near High Camp |
|
Carry more cash than feels necessary |
There are no ATMs on the trail |
|
Charge devices whenever you can |
Power and Wi-Fi become scarce, and unreliable, higher up |
Somewhere along the way, Mardi Himal picked up a reputation as "the easy trek." I understand why — compared to Annapurna Base Camp or the full Annapurna Circuit, it's short, usually done in around five to seven days round trip from Pokhara or Kande.
What actually makes the Mardi Himal Trek difficulty higher than its length suggests:
None of these individually is extreme. Together, over a few days, they add up. If you're a beginner, this isn't a reason to avoid Mardi Himal — it's genuinely one of the more approachable Himalayan treks for a first-timer. It's a reason to prepare properly instead of assuming a short itinerary means a light workload.
Note: For a full breakdown of what to expect day by day and how the terrain actually feels, it's worth reading a proper Mardi Himal Trek difficulty guide before you commit to dates.
If I had to pick one gear decision that shaped my entire trek, it wouldn't be my jacket or my sleeping bag. It would be my shoes. New shoes and multi-day descents on stone steps are how blisters happen, and a bad blister on day two can quietly ruin the rest of your trip.
A few things worth getting right:
The shoe test I wish I had done before the trek
Before you fly to Nepal, wear your trekking shoes on a walk of at least two to three hours, on hills or stairs if you can find them, with the socks you plan to actually wear. If you notice rubbing, tightness, or a hot spot anywhere, you have time to fix it now. You won't have that luxury on Day 2 of the trail.
Note: For the full rundown of what to bring beyond footwear, this Mardi Himal Trek packing list covers layering, gear, and the small items people forget.
Overpacking is probably the single most common mistake I see, and I made a version of it myself the first time.
The problem isn't just the weight of your porter or your own back. It's that a heavier bag makes every single uphill step on this trek noticeably harder, and Mardi Himal has a lot of uphill steps.
Commonly overpacked items I'd leave behind next time:
Pack This vs. You Can Probably Skip
|
Pack This |
You Can Probably Skip |
|
Layering clothes (base, mid, insulating) |
Too many outfit changes |
|
A lightweight down or synthetic jacket |
Heavy, bulky jackets |
|
Headlamp with spare batteries |
Extra bulky electronics |
|
Trekking poles |
Equipment you've never actually used |
|
Sunscreen and sunglasses |
A full-size cosmetics bag |
|
A few high-energy snacks |
A week's worth of home snacks |
Insider Tip: What actually deserves space in your bag: warm layers, rain protection, broken-in footwear, gloves, a headlamp, a reusable water bottle, sunscreen, sunglasses, any personal medication, basic first-aid supplies, and trekking poles. Everything else is negotiable. The full Mardi Himal Trek packing list is worth checking against your own bag before you zip it shut.
Mountain weather doesn't follow the forecast politely, and Mardi Himal's upper sections are exposed enough that you feel every shift. A clear, sunny morning can turn cloudy by early afternoon. Wind picks up without much warning once you're above the treeline, and visibility can drop surprisingly fast near High Camp and the viewpoint.
A few habits that would have saved me some discomfort:
Note: Mardi Himal Trek weather shifts by season, and the trail feels genuinely different depending on when you go — a good Mardi Himal Trek best time guide is worth reading before you lock in your dates.
This is the one I'd go back and tell myself most urgently: slow down, especially early on.
It's tempting to power through the first day or two, particularly if the trail feels manageable and you're excited. But energy on a multi-day trek doesn't work like a sprint — what you burn unnecessarily on Day 1 doesn't come back on Day 3, right when you need it for the upper ridge and the viewpoint push.
What worked better once I figured it out:
Insider Tip: Slow is often faster on a Himalayan trek. Arriving at camp with energy left means a better night's sleep, a better appetite, and a much easier start the next morning. A look at a typical Mardi Himal Trek itinerary shows how each day's distance and elevation gain actually stacks up, which makes it easier to pace yourself sensibly from the start.
Somewhere around Low Camp, the trek quietly changes character. The forest thins out, then disappears, and you're walking an open ridge with sweeping views in every direction — and nothing to block the wind.
What's different up here:
Note: None of this is dangerous if you're prepared and paying attention. But it does mean shifting your mindset: layer up before you're cold, not after, keep your footing deliberate on loose sections, and stay focused rather than distracted by the view (as tempting as that is). The forest section and the ridge section genuinely feel like two different treks stitched together.
The final push to the Mardi Himal viewpoint gets described casually in a lot of itineraries - "short hike before sunrise" — and that undersells it. It's a cold, dark, steady climb, and being unprepared for any one of those three things makes it miserable.
You'll typically be leaving High Camp in darkness, walking by headlamp, in temperatures well below what you felt during the day. The pace is slow because of the incline and the altitude, and how clear the view actually is depends heavily on timing — clouds tend to build as the morning goes on, so an early start isn't just tradition, it's practical.
Before Leaving High Camp
Note: Check the Mardi Himal Trek itinerary for where High Camp sits and how much elevation the viewpoint push actually covers — it helps to know what you're walking into before it's still dark outside your teahouse window.
This is the section I'd underline if I could. Almost everyone I've met prepares mentally for the climb up. Almost no one prepares for the climb down — and the descent is where a lot of the real strain happens.
Downhill walking on stone steps and loose trail, for hours, on legs that are already tired from the days before, is hard on your knees in a way that sneaks up on you. It's also where slips are more likely, simply because fatigue affects your footing more than people expect.
What actually helped:
Insider Tip: If your shoes have good grip and your poles are adjusted properly for downhill use (slightly longer than your uphill setting), the descent becomes manageable rather than punishing.
Hydration on a multi-day trek is less about drinking a lot at once and more about drinking consistently throughout the day. Waiting until you feel thirsty means you're already a step behind.
Practical habits that helped:
Insider Tip: I want to be clear about one thing: staying hydrated is good general trekking practice, but it isn't a guaranteed prevention for altitude sickness, and it shouldn't be treated as one.
Mardi Himal doesn't reach the extreme altitudes of some other Annapurna region treks, but you're still climbing high enough that altitude matters, and treating it casually is a mistake.
The basics worth knowing:
A clear safety note: Altitude sickness can become serious. Persistent or worsening symptoms should never be ignored. Follow your guide's advice, and seek medical assistance or descend when necessary. This isn't a topic to take shortcuts on — a dedicated Mardi Himal Trek altitude guide is worth reading in full before you go, and organizations like the Himalayan Rescue Association and the CDC's high-altitude travel guidance are worth a look for genuinely authoritative information.
Your porter or main duffel carries the bulk of your gear — but what's in your own daypack, on your own back, matters every single hour of the walk.
What actually earns a spot in your daypack:
Insider Tip: Everything else — spare clothes, bulkier gear, anything you won't need until you reach camp — belongs in your main duffel, not on your back.
Teahouse menus along Mardi Himal are more varied than you might expect, but this isn't the trip to test your adventurous eating limits. Your appetite naturally dips at altitude and after long walking days, so sticking to food that's reliably filling and easy to digest matters more than variety.
What tends to work well:
Insider Tip: One habit worth building: eat before you're extremely hungry. Waiting too long between meals on a trek tends to leave you running on empty right when you need energy for a climb.
Teahouses along Mardi Himal are basic, and they get more basic the higher you climb. This isn't a complaint ; it's the nature of trekking accommodation at altitude but it's worth knowing before you arrive expecting something closer to a Pokhara guesthouse.
Realistic expectations:
Insider Tip: A good sleeping bag, rated for the temperatures you'll actually face at High Camp, matters more here than almost any other piece of gear. Blankets provided by teahouses help, but shouldn't be your only layer against the cold.
There are no ATMs on the Mardi Himal trail, and card payments aren't a reliable option once you leave Pokhara. Everything from extra snacks and hot drinks to device charging, hot showers, and any accommodation extras is typically paid in cash.
It's worth carrying more Nepali rupees than feels strictly necessary, with a buffer for:
Note: Prices vary by season and teahouse, so rather than relying on fixed figures, it's worth checking a current Mardi Himal Trek cost breakdown before you go, and building in some margin above whatever estimate you land on.
Charging options thin out the higher you climb, and cold temperatures drain batteries faster than usual. A few habits made a real difference for me:
Before Leaving Pokhara
This one is less practical and more about how you'll actually remember the trek. It's tempting to stop for every viewpoint, every angle, every changing bit of light — and there's nothing wrong with photographing what genuinely moves you. But constantly stopping breaks your walking rhythm, adds up to real fatigue over a day, and can distract you from noticing weather changes or trail conditions.
Insider Tip: What worked better: photograph intentionally, at the moments that actually matter to you, and let the rest of the walk just be a walk.
Somewhere in the middle of the trip, I stopped trying to "finish" each day and started actually walking it — noticing the shift from rice terraces to rhododendron forest, saying more than a passing hello to the people running the teahouses, watching the ridge line change as the light moved. That was the version of the trek I actually remember.
Insider Tip: Respecting your own pace, taking real breaks, leaving room for weather to shift your plans slightly — none of that makes the trek less of an achievement. If anything, it's the difference between finishing a trek and actually experiencing one.
Light bag + broken-in shoes + slow, steady pace + early starts + proper layers + consistent hydration + a flexible mindset = an easier, more enjoyable Mardi Himal Trek.
Each part pulls its own weight: a light bag saves your legs on every single step of elevation gain. Broken-in shoes prevent the blisters that derail more treks than altitude does. A slow, steady pace protects the energy you'll need later. Early starts give you the best shot at clear viewpoint weather. Proper layers keep you comfortable through genuinely different conditions in a single day. Consistent hydration keeps you functioning well. And a flexible mindset means a weather delay or a slower day doesn't feel like a failure — it's just the mountain doing what mountains do.
4 Weeks Before -
Build in regular walking, ideally on hills or stairs - Add basic cardio a few times a week - Start breaking in your trekking shoes on real walks
2 Weeks Before -
Practice walking with your loaded daypack, not empty - Test your full layering system together, not piece by piece - Check all equipment — poles, headlamp, rain gear — actually works - Organize permits and documents
3–5 Days Before -
Check the weather forecast for your trekking window - Confirm transport to your starting point - Organize enough cash for the whole trek plus a buffer - Fully charge all devices and power banks - Pack deliberately, checking your list against what you're actually taking
Night Before -
☐ Daypack packed with next-day essentials - ☐ Duffel packed and weighed - ☐ Documents and permits in an accessible, dry pocket - ☐ Phone and power bank charged - ☐ Alarm set with real buffer time - ☐ Weather checked one last time
Documents - ☐ Passport and permits - ☐ Travel insurance details (with altitude/trekking cover) - ☐ Printed or photographed copies as backup
Clothing - ☐ Base, mid, and insulating layers - ☐ Waterproof and windproof outer layer - ☐ Warm hat and gloves - ☐ Buff or scarf
Footwear - ☐ Broken-in trekking shoes - ☐ Proper trekking socks (multiple pairs) - ☐ Camp shoes or sandals for evenings
Health & Safety - ☐ Personal medication - ☐ Basic first-aid kit and blister patches - ☐ Sunscreen and lip balm - ☐ Awareness of altitude symptoms and what to do about them
Electronics - ☐ Headlamp with spare batteries - ☐ Power bank, fully charged - ☐ Phone with offline maps downloaded
Money - ☐ Enough Nepali cash for the full trek plus a buffer - ☐ Small denominations for daily purchases
Food & Water - ☐ Reusable water bottle - ☐ Water purification method or tablets - ☐ A few trail snacks
Weather - ☐ Checked forecast for your trekking window - ☐ Rain protection accessible, not buried
Route & Permits - ☐ Confirmed permit requirements for the Annapurna Conservation Area - ☐ Itinerary shared with someone outside the trek - ☐ Guide or agency contact details saved
Q. Is the Mardi Himal Trek difficult for beginners?
➤ It's considered one of the more beginner-friendly treks in the Annapurna region, but it's not effortless. Steep stone steps, an exposed upper ridge, and a demanding descent mean reasonable fitness and preparation still matter, even on a short itinerary.
Q. How should I prepare for the Mardi Himal Trek?
➤ Build up regular walking or hiking fitness for several weeks beforehand, break in your trekking shoes properly, and practice walking with a loaded daypack. Beyond fitness, preparation also means packing smart, understanding the itinerary, and knowing the basics of altitude awareness.
Q. What should I pack for the Mardi Himal Trek?
➤ Focus on layering: base, mid, and insulating layers, plus waterproof outerwear, broken-in trekking shoes, gloves, a headlamp, sunscreen, and trekking poles. Avoid overpacking — a lighter bag makes every climbing day easier.
Q. How cold does the Mardi Himal Trek get?
➤ Temperatures drop significantly at High Camp and along the upper ridge, especially early morning and after sunset, often well below freezing in the colder months. Conditions in the lower forest sections are considerably milder.
Q. Do I need trekking poles for the Mardi Himal Trek?
➤ They're not mandatory, but most trekkers find them genuinely useful — especially on the steep stone steps and the long descent, where they reduce strain on your knees.
Q. How much water should I carry?
➤ Enough for the stretch of trail ahead, factoring in exposure and effort, with a habit of sipping regularly rather than waiting until you're thirsty. Refill and treat water at teahouses along the way rather than relying solely on bottled water.
Q. What is the hardest part of the Mardi Himal Trek?
➤ Most trekkers find the exposed upper ridge, the early-morning viewpoint push, and the long descent to be the most physically demanding parts — more so than the earlier forested sections.
Q. How early should I start the viewpoint hike?
➤ Most trekkers leave High Camp well before sunrise, in the dark, to reach the viewpoint while visibility is clearest — clouds tend to build as the morning goes on.
Q. What should I avoid on the Mardi Himal Trek?
➤ Avoid new, unbroken-in shoes, an overpacked bag, rushing the first days, ignoring changing weather, and pushing through worsening altitude symptoms instead of telling someone.
Q. How can I make the Mardi Himal Trek easier?
➤ Pack light, break in your shoes early, pace yourself from Day 1, start the viewpoint hike early, take the descent seriously, and stay flexible if weather or fatigue asks you to slow down.
Prepare smart, not heavy. Pace yourself, not the group next to you. Respect the descent as much as the climb. And give yourself the best possible shot at clear skies by starting early.
Planning your Mardi Himal adventure?Contact Orbit Nepal Adventure to arrange your permits, licensed guide, transportation, and a complete trekking itinerary built around your schedule and fitness level.
📲 Contact us directly on WhatsApp: Chat with us on WhatsApp
🌐 Visit: orbitnepaladv.com
📧 Email: orbitnepaladv@gmail.com
💬 Whatshapp: 977-9841766021
Our Package : Madri Himal Trek